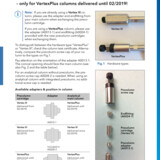
How to remove and how to reinstall an integrated precolumn to a KNAUER HPLC column:
Tools Required:
Open end wrenches (1/4’’ and 13 mm)
Replacement Precolumn Cartridges:
Depend on the stationary phase in the analytical column. If you are not sure just contact KNAUER to choose the best fitting precolumn.
Vertex III Precolumn screw cap A0028-2:
For Vertex III column without integrated precolumn, when a precolumn is installed. Not needed when a precolumn cartridge is replaced at a Vertex III column with integrated precolumn.

Procedure:
- Wait for the column to depressurize before replacing or installing a cartridge.
- Remove the Column screw cap using the 1/4’’ and 13 mm wrenches at the spanner flat at the column and on the screw cap. Don´t be afraid, column material cannot get out. It is fixed with sieves and seals.
- If a precolumn is first installed: Use only the endfitting from the Vertex III column. Use the connector and precolumn screw cap from A0028-2. If a precolumn cartridge is replaced: Use the endfitting, the connector and the precolumn screw cap from the Vertex III column. Special case: If you are using a Vertex Plus column (delivered until 02/2019) and are now installing a Vertex III precolumn, please refer to the supplement V7623 delivered with the new precolumns.
- Assemble the column and your chosen precolumn cartridge as indicated below. Use the 1/4’’ and 13 mm wrenches to fasten the precolumn screw cap.

